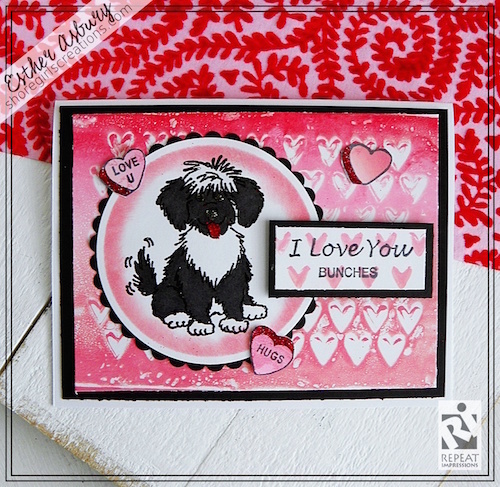
Hello Stamping Friends! Esther here sharing a fun background created on my Gelli Printing Plate!
First let’s gather our supplies.
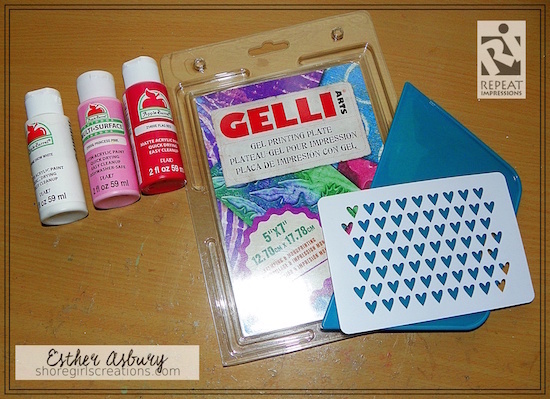
You’ll need:
Gelli Printing Plate
Acrylic Paint in these colors: Flag Red, Princess Pink, Snow White
Paint Smoothing Tool
Heart Stencil (Firefly)
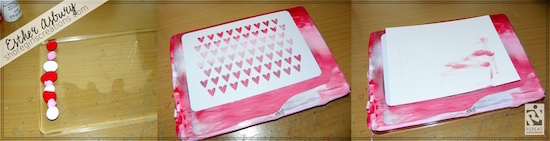
Step One: Place some dots of paint along the left side of your gelli plate
Step Two: Using your paint smoothing tool, spread the paint across the plate, blending colors as you go
Step Three: Lay down a stencil
Step Four: Pick up a print on a clean sheet of paper
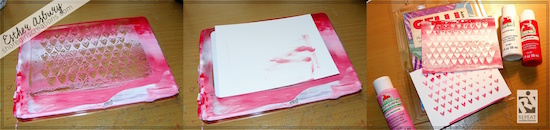
Step Five: Remove the stencil from your plate
Step Six: Pick up another Print
You’ll now have a negative and positive print of your stenciled design!
Note: Depending on the amount of paint you used, you may be able to re-smooth the surface and pick up more prints
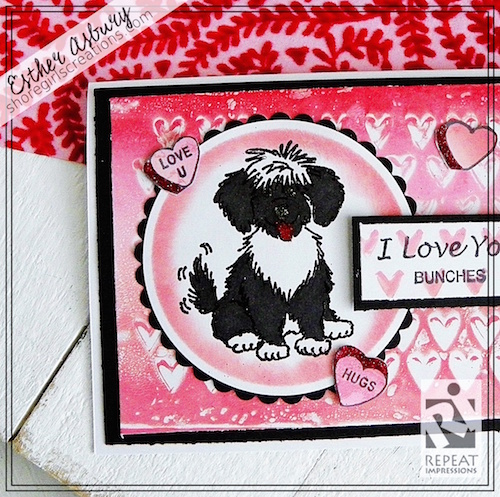
As you can see from my card, I used the negative print for the background and the positive print for the sentiment.
I also picked up some of the paint outside my stenciled area on a separate piece of paper and stamped my candy hearts on that.
Other supplies used on my card:
• Circle/Scallop Circle Nestabilities (Spellbinders)
• Worn Lipstick Distress Oxide
• Sponge Daubers
• Versamark Watermark Ink (Tsukineko)
• Midnight Black Embossing Powder (Stampendous)
• Red Glitter
• Touch Five Markers
• Repeat Impressions Stamps:
8120-K, Scruffy Puppy
9707-B, Love U Candy Heart
9708-B, Hugs Candy Heart
9709-B, Candy Heart
9711-E, I Love You
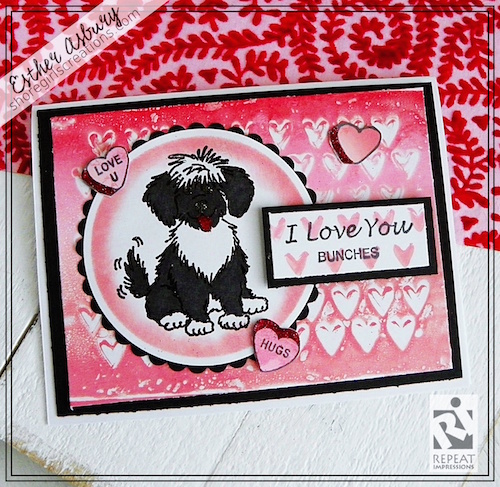
For this week only (Jan. 14-20, 2019), get 20% Off all the stamps used in Esther’s creation above when you use the coupon code POTW11419
GIVEAWAY: Esther is giving away the adorable little Scruffy Puppy dog stamp on her Instagram account - for all the details visit her page by clicking HERE.
2 Responses to “Pick of the Week ~ Gelli Printing”
Sorry, the comment form is closed at this time.
This is a fabulous tutorial, Esther!!! I love your stamp picks, too.
This is so adorable!!! Fabulous background and this little pup is so sweet!