Jan 142019
 

Hello Stamping Friends! Esther here sharing a fun background created on my Gelli Printing Plate!
First let’s gather our supplies.
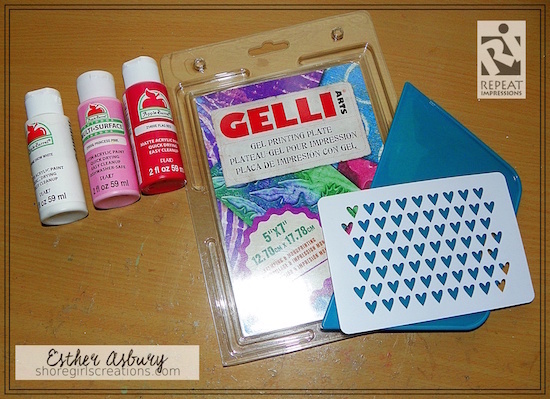
You’ll need:
Gelli Printing Plate
Acrylic Paint in these colors: Flag Red, Princess Pink, Snow White
Paint Smoothing Tool
Heart Stencil (Firefly)
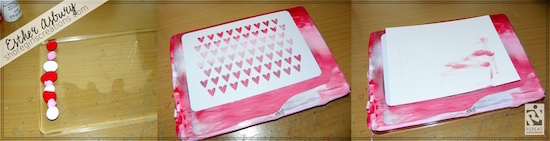
Step One: Place some dots of paint along the left side of your gelli plate
Step Two: Using your paint smoothing tool, spread the paint across the plate, blending colors as you go
Step Three: Lay down a stencil
Step Four: Pick up a print on a clean sheet of paper
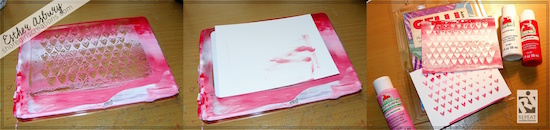
Step Five: Remove the stencil from your plate
Step Six: Pick up another Print
You’ll now have a negative and positive print of your stenciled design!
Note: Depending on the amount of paint you used, you may be able to re-smooth the surface and pick up more prints
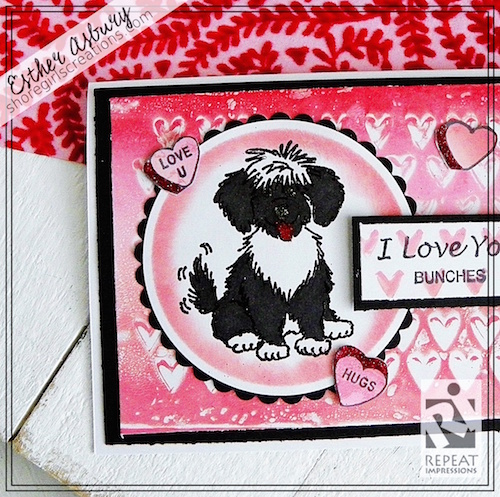
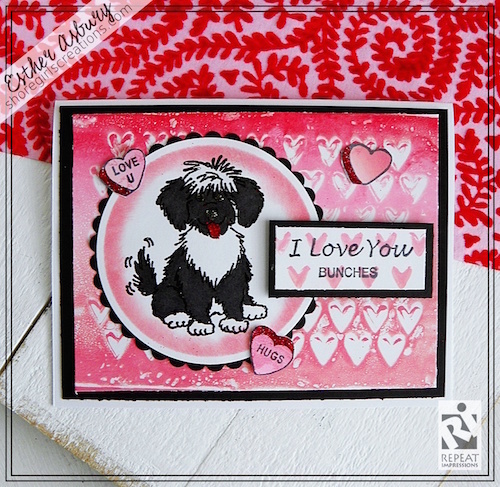
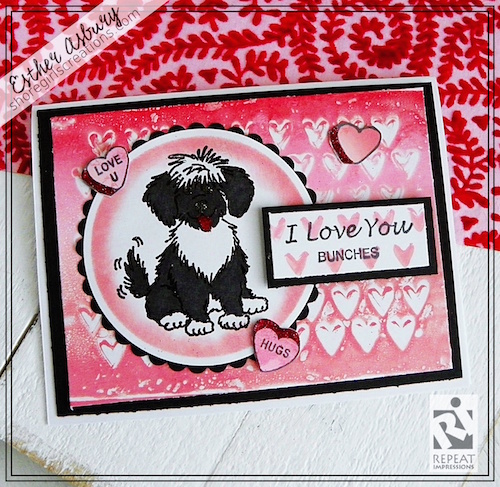
As you can see from my card, I used the negative print for the background and the positive print for the sentiment.
I also picked up some of the paint outside my stenciled area on a separate piece of paper and stamped my candy hearts on that.

Other supplies used on my card:
• Circle/Scallop Circle Nestabilities (Spellbinders)
• Worn Lipstick Distress Oxide
• Sponge Daubers
• Versamark Watermark Ink (Tsukineko)
• Midnight Black Embossing Powder (Stampendous)
• Red Glitter
• Touch Five Markers
• Repeat Impressions Stamps:
8120-K, Scruffy Puppy
9707-B, Love U Candy Heart
9708-B, Hugs Candy Heart
9709-B, Candy Heart
9711-E, I Love You
For this week only (Jan. 14-20, 2019), get 20% Off all the stamps used in Esther’s creation above when you use the coupon code POTW11419

GIVEAWAY: Esther is giving away the adorable little Scruffy Puppy dog stamp on her Instagram account - for all the details visit her page by clicking HERE.
Nov 192018
 

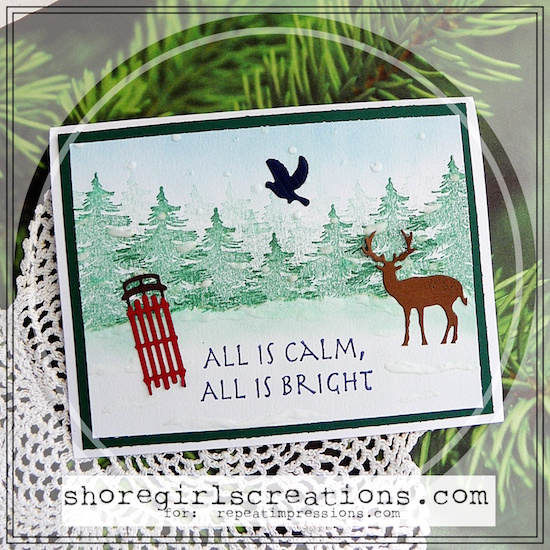
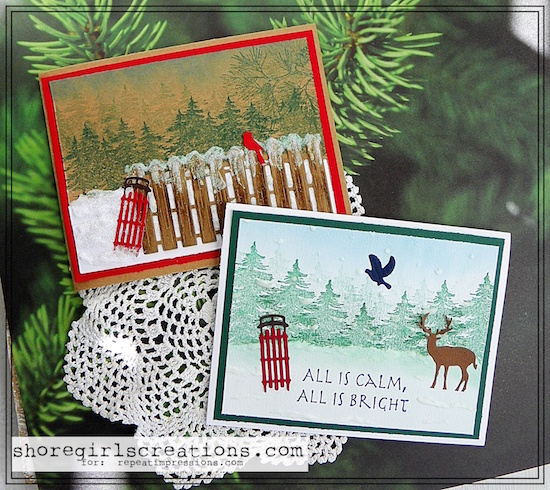
Hello friends, Esther here with two winter cards that showcase two fun techniques.

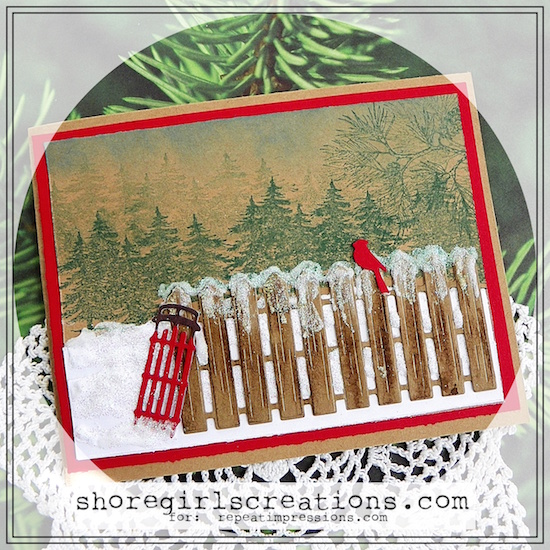
The first technique is creating a forest with just one tree stamp. The second is an old recipe for making your own puffy snow with just two ingredients!
Let’s get started….

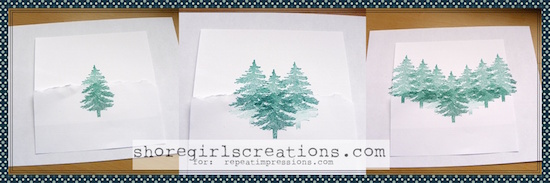
We’ll start with making a forest of trees (of varying heights) with just one tree stamp.
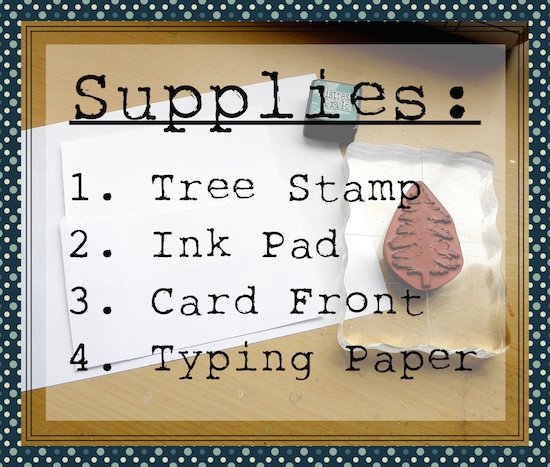
First off you’ll need to gather your supplies: Card front, thin paper, tree stamp, ink pad

1. Tear your thin sheet of paper in a jagged line and lay it across your card front midway down so as to mask off the lower portion of your card
2. Ink up you tree stamp and stamp just the top portion above the torn paper line in the center of your card front
3. Repeat step two only this time stamp a larger portion of the tree above the torn paper line on either side of your already stamped tree
4. Repeat step three until you have a tree line across your card front

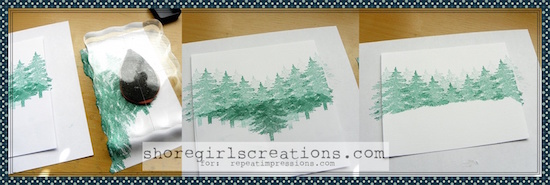
Now let’s create depth and dimension to our forest…..
1. Ink up your tree stamp, stamp it off on a piece of scrap paper then stamp it above your already stamped tree line
(This creates a very light, shadowy tree adds a 3d look to your forest)
2. Repeat step five till you’ve created a sufficient amount of depth to your forest

Now let’s make some puffy snow to add to our winter scene…
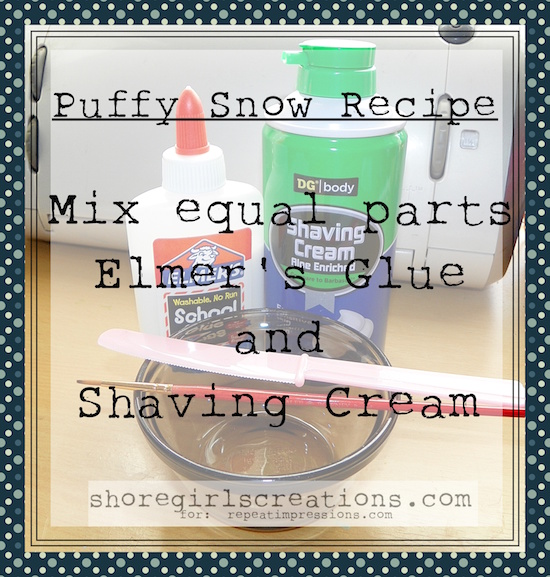
The only two supplies you’ll need are:
1. Elmer’s glue
2. Shaving Cream

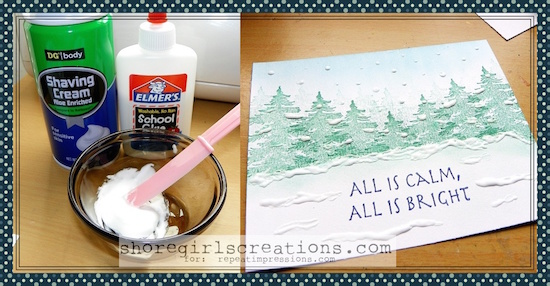
Directions: Mix together equal parts of glue and shaving cream till thick
Using a thin paint brush apply to your card front and allow to dry

As you can see, I went a little light with the snow on the first card, but I also wanted to see what it would look like if I put it on heavy.
To do that, I created a second card that not only includes puffy snow, but also has white glitter sprinkled over it (while wet) for a sparkle effect.
I created the forest scene by stamping the large pine forest stamp across the card front and then stamping it off and re-stamping behind the first layer.

I’d love to see any cards you create with these two fun techniques, so be sure to come by the blog and link them up to our “Anything Goes” challenge next week!

Here are the supplies I used on these fun winter cards:
Dies: Miniature Sled (Memory Box), Deer Die (Unknown), Animal Crackers (Cuttlebug), Farm Fence (Honeybee Stamps), bird from Birch Tree dies (Impression Obsession)

Ink: Pine Needles/Salty Ocean/Broken China/Chipped Sapphire/Mermaid Lagoon/Ground Espresso Distress Ink (Ranger)

Misc: Shaving Cream, Elmer’s Glue, White Glitter

Repeat Impressions Stamps:
2220-G, All Is Calm
2719-K, Lg Pine Tree
2709-I, Large Pine Forest
2708-M, Pine Branch

For this week only (Nov. 19-25, 2018), get 20% Off the stamps used in Esther’s creations above when you use the coupon code POTW111918

Sep 242018
 

Hello crafty friends! I’ve been having fun creating some large 3D sunflowers for fall themed cards. It got me to thinking….. wouldn’t it be fun to make some mini 3D flowers as well?
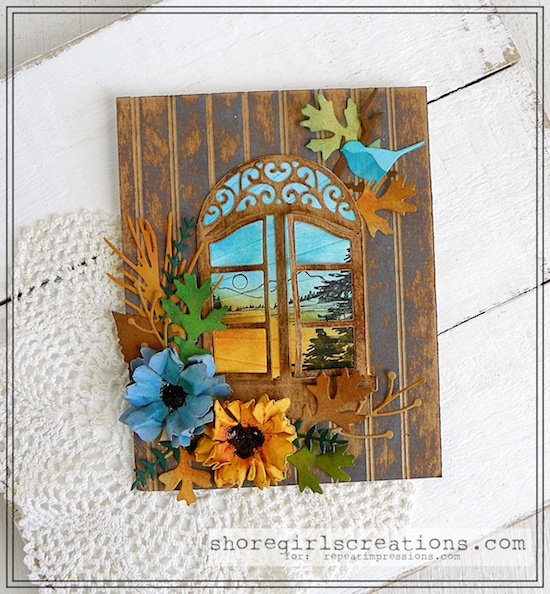
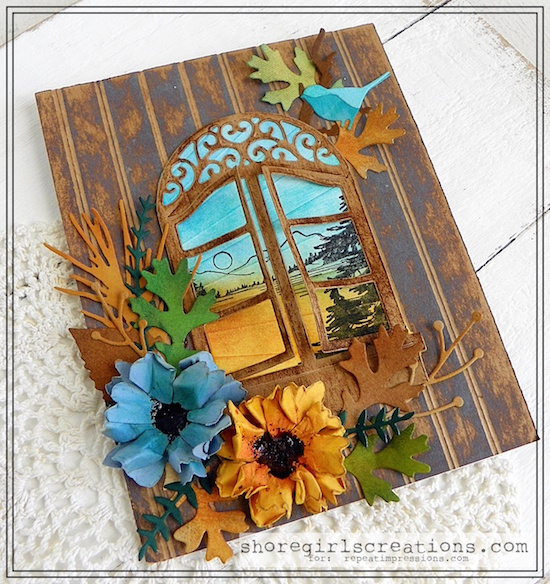
Well it was fun, and today I’m sharing the super easy steps to making these bright and cheerful blooms using the 10307-H, Patti’s Flower Outline Repeat Impressions stamp.

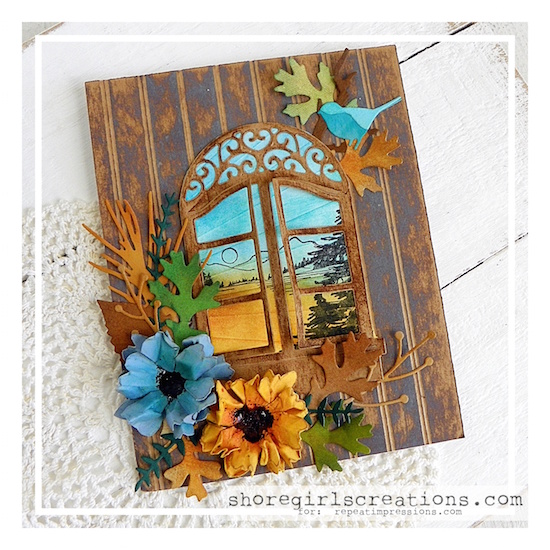
To create my card I:

- Embossed a piece of white card stock with the sunburst embossing folder from Darice
- Sponged Salty Ocean, Peacock Feathers, Fossilized Amber, Spiced Marmalade distress ink (Ranger) over the embossing
- Stamped 629-I, Mountain Vista and 2719-K, Lg Pine Tree over the sponging in Black Soot Distress Ink (Ranger)
- Scored a piece of kraft card stock (Martha Stewart scoring board) every 1/2 inch 
  • to create the double lines I slightly offset the original scoring and scored again
  • inked my background with Walnut Stain Distress Oxide (Ranger)

- Die cut a window using the Window Two die from Spellbinders

  •  inked it with Gathered Twigs distress ink (Ranger)

To create my 3D Flowers I:
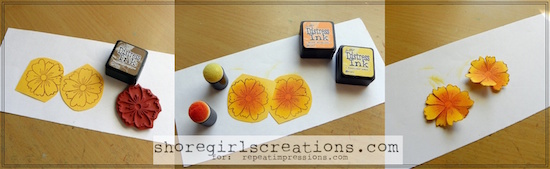
Stamped 10307-H, Patti’s Flower Outline in Gathered Twigs Distress Ink (Ranger) on yellow card stock
Inked the centers (using sponge daubers) with Fossilized Amber & Spiced Marmalade Distress Ink (Ranger)
Fussy cut the flowers and snipped the petal lines

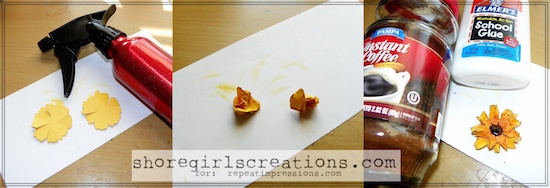
Turned my flowers over and spritzed them with water
Crumpled each flower into a tight ball
Unfolded and pinched a few petals for more dimension before drying with a heat gun
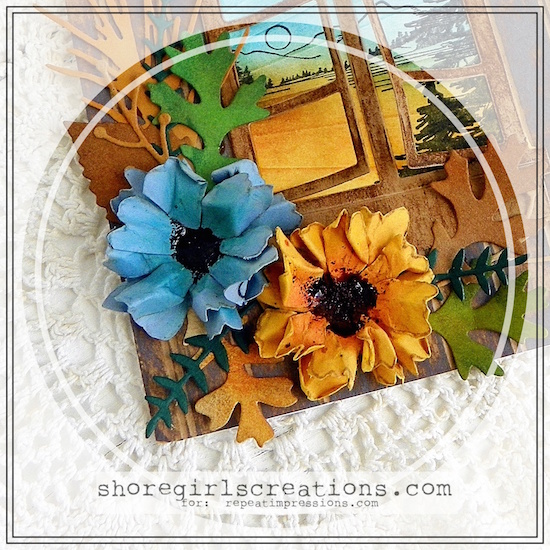
Layered one on top of the other and added some instant coffee granules to the center with Elmer’s Glue

The last step was creating a collage of flowers and leaves using the Fall Foliage Die set (Sizzix - Tim Hotlz) and the Meadowbird Branch die set (Memory Box).
I inked all the leaves and vines with distress ink to make them look a bit more realistic and add depth/dimension.

I hope you’ll try this super fun technique! And when you do, be sure to stop by and link up your projects in this week’s “Anything Goes” Challenge so we can all enjoy your creativity!

~ Esther

For this week only (September 24-30, 2018), get 20% Off the stamps used in Esther’s creation above when you use the coupon code POTW92418

Jul 302018
 

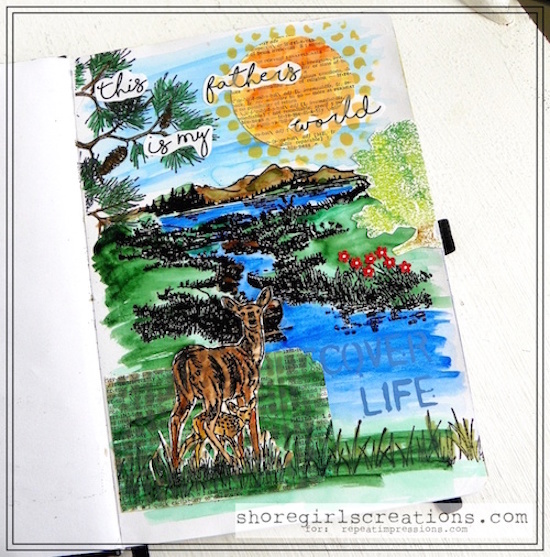
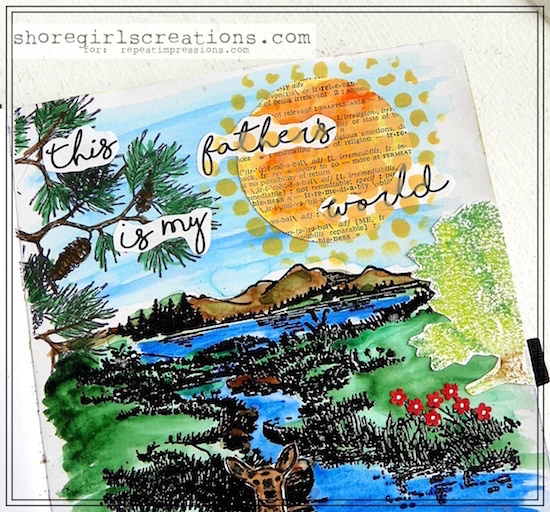
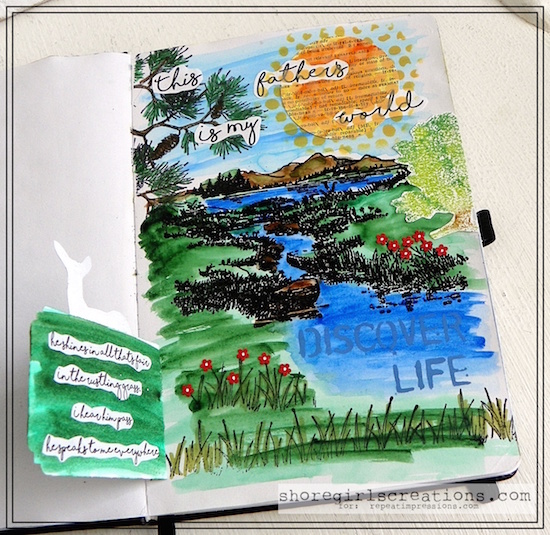
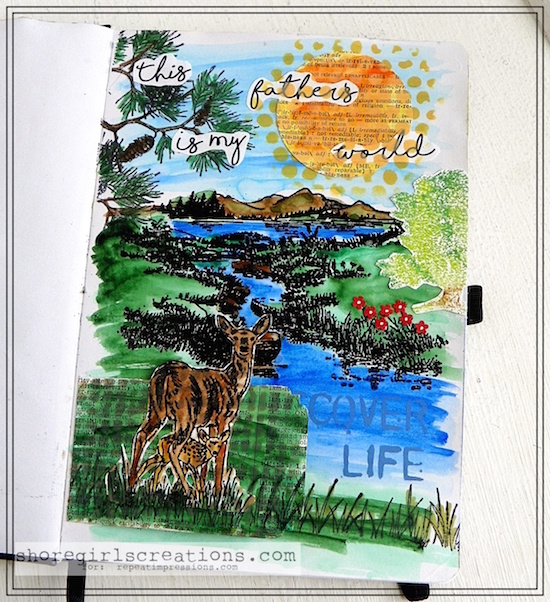
Hello crafty friends! Today I’m walking you through the steps I used to create a nature scene with some of my favorite RI stamps. The one I created is in my art journal (a new hobby of mine), but you can use these same techniques in your card making.

The first thing I did was to prep my page with a layer of Clear Gesso. This keeps the paints from soaking in (and through) your paper and also lets you move colors around longer without “pilling.”
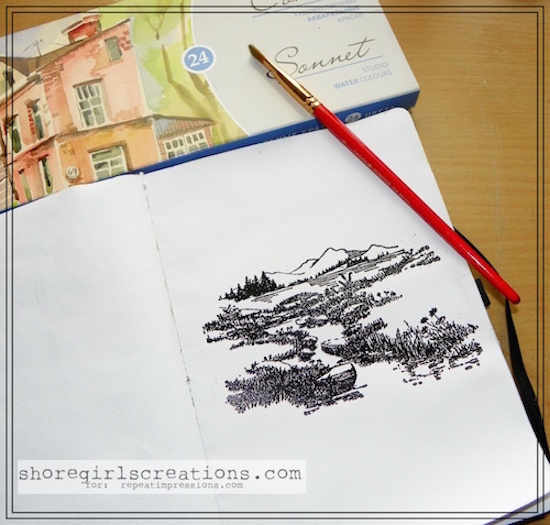
Next I stamped 1712-P, By the Stream and 629-I, Mountain Vista in Versamark Watermark Ink on the center of my page.
I added black embossing powder to the stamped design and heat set it.
Now it’s time to color!
I used my Sonnet Watercolors to create a stream and the grassy meadow.
I used lighter colors on the sky and mixed greens and browns for my mountains.

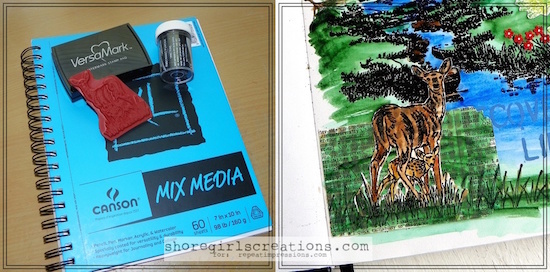
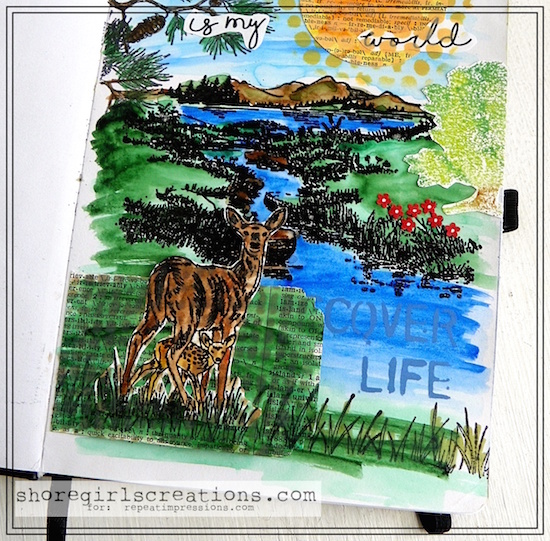
I stamped the 4218-K, Whitetail Doe and Fawn in versamark ink (on watercolor paper), added black embossing powder, and heat set.
I also colored this with my Sonnet Watercolors

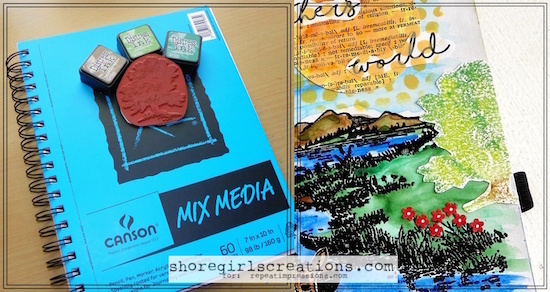
I inked up my 1613-J, Summer Tree stamp with Mowed Lawn Distress Ink and bounced my Pine Needles ink pad around the edges for a more realistic - two tone look.
The tree trunk was inked with Vintage Photo distress ink, and then I lightly spritzed the whole thing with water before stamping it on watercolor paper.
I fussy cut around it and added half of it to the right edge of the page.

If you want to add a little more interest to your page (or card) you can change up the elements by cutting some out of dictionary pages like I did.
Using a circle punch I cut a large sun and a tag from dictionary page (both of these are water-colored as well).

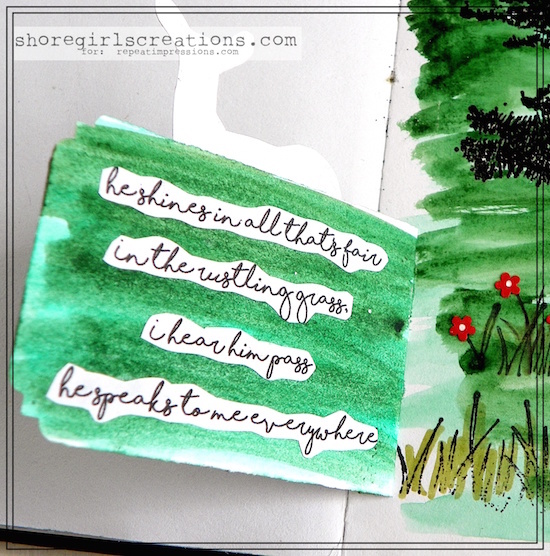
I thought it would be fun to add an interactive element to my page, so I attached just the left side of my tag to the bottom of my page.
I stamped the 1507-J, Grass Border across the bottom and added my water colored deer over top.

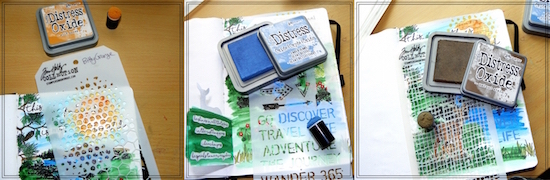
Using three different Tim Holtz stencils I added even more dimension to my scene.
I sponged Wild Honey distress oxide through the Bitty Grunge stencil over top my sun.
I sponged Walnut Stain distress oxide through my Burlap stencil over my deer and tag.
I sponged Faded Jeans distress oxide through two of the words on the Air Travel stencil into my stream.

On the inside of my tag I added the words to one of my favorite hymns - This Is My Father’s World - it goes along with this scene perfectly
“This is my father’s world
He shines in all that’s fair
In the rustling grass, I hear him pass
He speaks to me everywhere”

I stamped the 1507-J, Grass Border across the bottom, and using my Touch Five Markers I added a bit more green color to the blades of grass.
I also punched some tiny flowers with the Scalloped Daisy Fiskars Border Punch and created a few patches of wildflowers.
I added tiny white centers to my blooms with a white gel pen.
I stamped the 2708-M, Pine Branch in the top left corner and traced over the branches and pine cones with green and brown Touch Five markers.
(All of the wording on this page was computer generated.)

I hope you’ve enjoyed this picture tutorial for one of the ways I enjoy creating scenes.
You can achieve a variety of different looks depending on the medium you use to color with and how much layering you want to do.
The important thing is to enjoy creating - and I certainly did that with this art journal page!

Until next time — Happy Stamping!
~ Esther

For this week only (July 30 - August 5, 2018), get 20% Off the stamps used in Esther’s creation above when you use the coupon code POTW73018