Hello, stamping friends! Over the years I’ve met a fair share of stampers who either shy away from the photo image type of stamps or who have tried them with less than stellar results. But you can easily get great stamped images from your photo stamps if you just follow a few easy tips.
Unlike the traditional line art stamps we all use, photo image stamps are made up of a really tight dot pattern, not solid outlines. If you have ever looked at a photo in a newspaper thru a magnifying glass then you know what I am talking about. So keeping that in mind, we need to treat this type of stamp a little differently.
First of all, it is very important to start with a really clean stamp. That tight dot pattern of rubber likes to hold on to lint and hair and everything else so I always run a big piece of packing tape over the rubber to pull out any stray stuff before I get started.
When applying ink to the stamp, do not push it directly into an ink pad as you will most likely clog up all those tiny spaces between the dots with too much ink and end up with a muddy impression. Don’t try rubbing the ink pad across the surface of the stamp either. I have had people think their stamps were defective for these very reasons, but once I shared the proper inking technique with them then they had great success.
I’ve found the best way to ink this type of stamp is by rolling the ink onto the stamp with a rubber brayer. Before you ink your stamp the rubber may not even look like there is an image there at all. But once you roll the ink over the surface of the stamp the details in the image pop up like magic. Again, you want to be careful not to over ink the stamp, so one or two passes with the roller should usually do the trick.
Also, I am not a big fan of Staz-On ink. Some people like it for photo stamping, but I find it a bit too heavy and it also dries a little too quick for my liking. I’ve always just used a good pigment ink like Memento or Adirondack with great results.
Another very important thing to keep in mind is the way you apply the stamp to your paper. With a regular line art stamp you would apply a nice even pressure and then just pull the stamp away from your stamping surface. But if you try this with a photo image stamp, the tight dot pattern has created such a suction that you end up pulling the ink right back off of your paper and the image will look all muddy. Instead, you want to apply a nice even pressure and then take your hand off the stamp. Only then will you pick the stamp up off your paper. That extra few seconds allows the stamp and ink to rest, naturally releasing the suction and giving you a nice clean image.
The type of surface you stamp on will make a difference too. If you are stamping on a more absorbent paper or card stock then you will still great results, but the image will look a bit softer or muted. And if you are looking for a more crisp image with a defined dot pattern then a harder or glossy card stock is the way to go. Either way looks good, it just depends on the look you are going for.
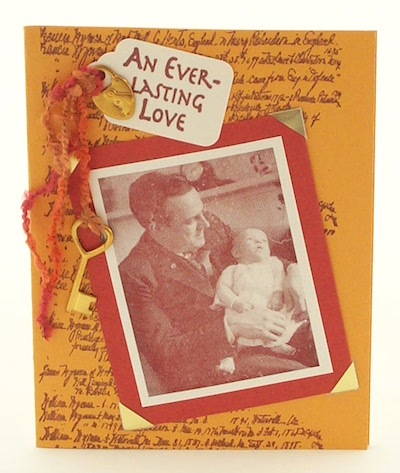
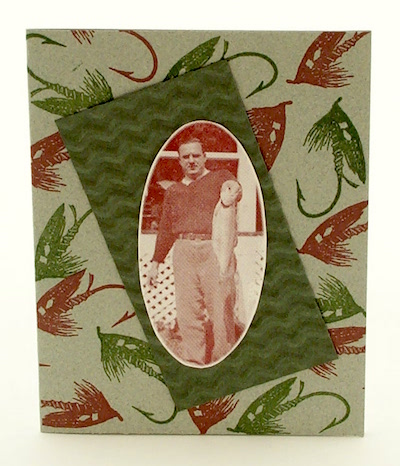
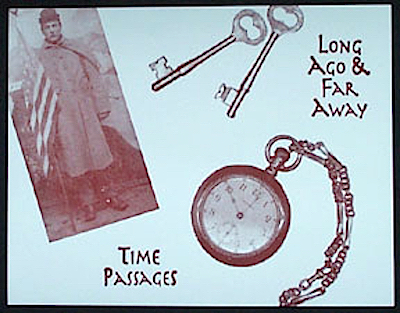
In the card examples below I have used my photo image stamps on glossy card stock.
For this first card I have used Repeat Impressions‘ stamps 6702-L Bill Jr. & Sr., 5016-N Genealogy and 6530-E Everlasting Love.
For this card I have used Repeat Impressions‘ stamps 6706-K Walter’s Catch and 6704-F Fishing Fly.
For this example I have used Repeat Impressions‘ stamps 6701-K Hiram, 6534-D Long Ago, 6535-C Time Passages, 6705-K Pocket Watch and 6710-J Keys.
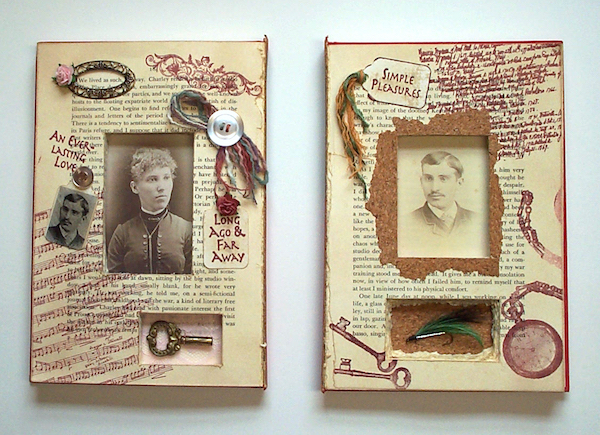
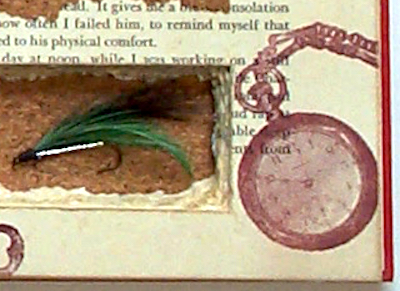
In the altered book example below where I have stamped on old book pages the photo stamp images still look great, but the results are a bit softer. These photos aren’t the greatest so it’s a little hard to tell, but in real life you will see quite a difference. Also, please note that the portraits framed in the center of each page are actually photographs. The stamps were used to embellish around them.
For the altered books I have used Repeat Impressions‘ stamps 5016-N Genealogy, 6530-E Everlasting Love, 6534-D Long Ago, 6705-K Pocket Watch, 6710-J Keys, 6526-E Simple Pleasures, 6711-F Willie, 6806-U Sheet Music and 6807-J Cherub Flourish.
Here’s a little closer look at the pocket watch.
So there you have it. These are my secrets to getting the best results from your photo image stamps. I hope you will give it a try. With a little patience and experimenting with the degree of pressure applied to your stamp… you will be on your way to photo stamping success!
And for this week only (March 19-25, 2018), get 20% Off the stamps used in my examples above when you use the coupon code POTW31918.
Thank you so much for stopping by today. I hope your first week of spring is off to a great start. And please be sure to visit with us again on Wednesday when we’ll be kicking off another great challenge with lots of wonderful inspiration from the RI Rock Stars.
Until then… happy stamping… always!
Wendy
Repeat Impressions
5 Responses to “Pick of the Week ~ Getting Great Images from Photo Stamps”
Sorry, the comment form is closed at this time.
Oh Wendy, these are some great tips and lovely examples! I especially like the altered book pages. I’ve never used photo stamps before, but you have me itching to try some!
Great POTW, Wendy. I’ve always struggled with photo stamps…I am going to try your techniques here and see if I can improve my stamping with these types of stamps. Thanks for the tips and love your cards and altered book.
Terrific projects, especially the altered books!
This was so information and great projects!
These are so fabulous!! I have to admit, that I am definitely one who has steered away from this type of stamp due to all the details, maybe now they won’t be so terrifying!